When you don’t have a steady cellular signal or immediate Wi-Fi access but need to communicate with others around you, you can set up an off-the-grid voice communications network using a Raspberry Pi and an Android app.
Apps such as Bridgefy will create a mesh network to communicate with other devices over Bluetooth. Still, when you’re traveling in a convoy and want to message people in other vehicles, all the metal will make that nearly impossible. Even in situations where you’re outside, but there are a lot of obstructions to block a Bluetooth signal, you’re better off using something else.
In cases where a hotspot router won’t be powerful enough to connect everyone, a Raspberry Pi with a decent wireless network adapter can help. With that and a PirateBox server running on it, you’ll be able to anonymously share images, videos, audio files, documents, voice communications, and other content, as long as everyone is connected to its Wi-Fi hotsHar
Hardware Requirments.
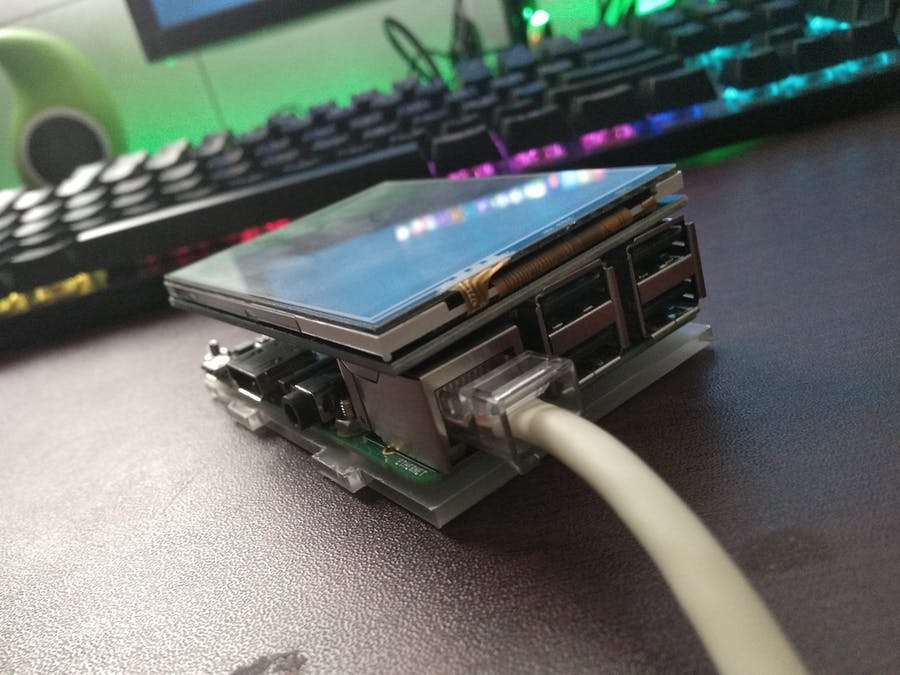
- RaspberryPI3: We’re using one of these models because the newer Raspberry Pi 4 doesn’t have a PirateBox image for it yet. However, any other Pi should work as long as you have a powerful wifi-dongle for them if they are not Wi-Fi capable.
- USB Flash Drive: A flash drive is needed to act as the hard drive for your PirateBox. The size will depend on how you use it, so the larger, the better.
- MicroSD Card: Make sure it’s a 16 GB or more. We recommend at least 32 GB to play it safe.
- MicroSD Card Reader: You can pick anyone of your choice except it should be working.
- Power Supply: This will be required to power up your RaspberryPI.
- Wireless network adapter with high gain antenna: You would want a stronger signal, which you most likely will and for that you’ll need a good, sturdy, and rugged Wi-Fi adapter. Make sure that the wifi adapter works with Kali Linux so you can use it for other purposes when needed. Plus, doing so will almost guarantee it will work with PirateBox. Also, a Wi-Fi booster can help make sure you all stay connected.
Setting Up Stuff
1. SetUp PirateBox: we need to download the custom Raspberry Pi image, but to do this we need a BitTorrent client. If you already have one, then that’s great, use it. Otherwise, we need to download one. Then Download this image. Now, we need to write the image to our microSD card. The best practice is to unplug any external hard drives or other USB devices you have, and then insert your microSD into its adapter and plug it in. This is important because you don’t want to accidentally flash the wrong device. You can use Etcher or RaspberryPI Imager to flash the image. Then wait till it is completed and then eject it safely without formatting any prompts. Plug the power and let it to turn on.
2. Connect to the PirateBox: To find out what the IP address of your PirateBox Pi is, do an arp-scan for it. Below, we can see that one of them is indeed a Raspberry Pi, most likely our PirateBox Pi, if there are no other Pis around.
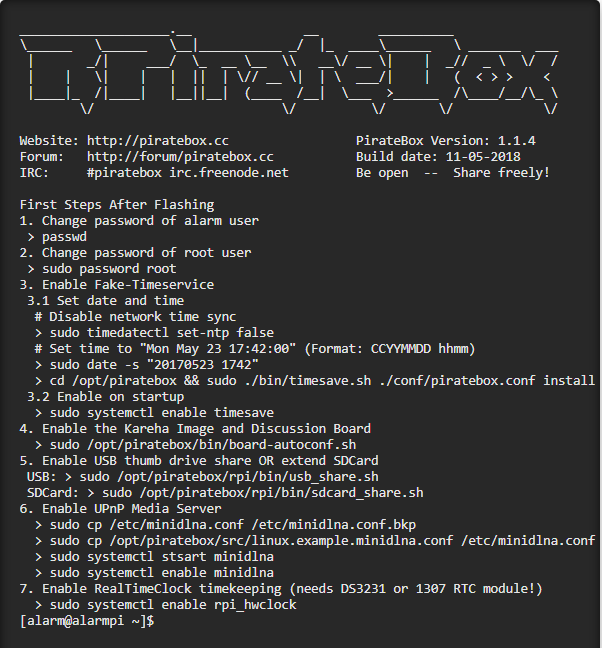
Now, let’s test it out to make sure that’s it. Make sure to swap out your Pi’s address with the one we have in the command below. Choose “yes” when asked to connect, then enter in your PirateBox Pi’s password. When you see the PirateBox screen, you’re golden.
3. Change the Wi-Fi Card (Optional): Now that we’re in our PirateBox Pi if you’re using an external Wi-Fi adapter and not the internal one, we need to change one variable in the /boot/wifi_card.conf file to switch from its internal card to the network adapter we want to use instead. First, we need to find the card’s name, so let’s use ifconfig. If you only see one card, such as wlan1, then you’ll need to do an IP scan instead, where you’ll likely see wlan1 and wlan0, which is what I got.
To get the second card up and running, use the following, replacing the card’s name with your own. Type in your password afterward. Then, if you go back up and use just ifconfig, you should see both cards now. Now, open up that config file mentioned earlier in nano and make sure it says the name of the Wi-Fi adapter you’re using. Press Control-X on your keyboard to quit nano. If you changed the name, hit Y, then Enter, to save it.
So, now we have changed the Wi-Fi card that the Raspberry Pi is using. In our case, we’re currently using the external card, but if you need to switch back, it’s as easy as going back into the config file and changing it.
4. Install Intercom & Connect to PirateBox: Download and install the app we’re using for our communications on all of the Android devices that will be talking with one another using the PirateBox Pi. That app is called “Intercom For Android”. Now Install the application and disconnect from your mobile data on your Android phone, then open up your Wi-Fi settings, find your PirateBox Pi, and connect to it. Your phone may warn you that there is no internet available, but we don’t need it. When you connect to PirateBox, the PirateBox page should open right away, but we’re not interested in the PirateBox interface right now.
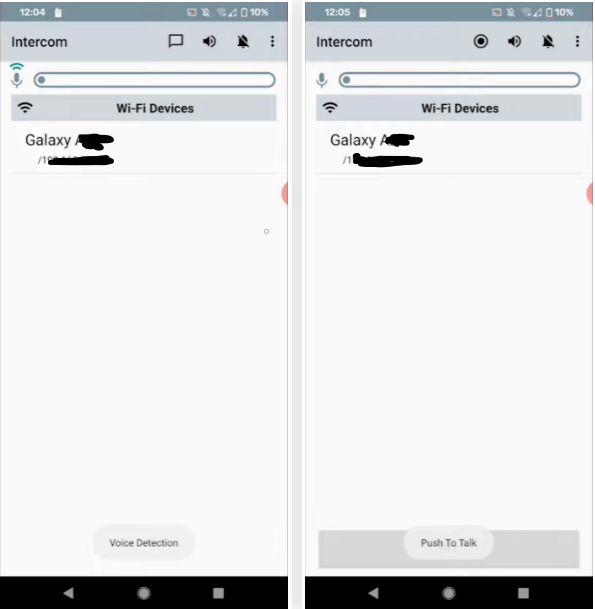
5. Talks To Others: Now, open up Intercom for Android. You should see a list of devices that are connected to the PirateBox Pi. If not, touch the compass to see if that makes them appear. And if that doesn’t work, you may need to connect to the other devices via Bluetooth at first, which seems to jog the app into recognizing them. Hopefully, that’s not the case for most of you since it should be easy for anyone to connect without additional work.
You will see a device, and if you tap the Wi-Fi icon, it should ping it so that it makes a noise to tell that you are connected and can communicate. To talk them, press and hold the “PTT” button below and start talking. All connected devices should hear you if their apps are open too. Alternatively, you can tap the dot-within-a-circle icon up top to switch modes. Doing so will enable voice detection, so you won’t have to keep pushing the “PTT” button. Just talk, and it will hear you and transmit the communications to others on the network. To switch back to push-to-talk, tap the comment box icon.
After following this guide, you should be able to connect multiple Android phones together. Even if there’s no cellular network available. Pretty cool, right? Stay Tuned For More Tricks.